Move-In Inventory Checklist: Protect Your Security Deposit (Free Template)
A room-by-room move-in inventory checklist for landlords and tenants, with photo tips, fair wear and tear examples and how to use it at move-out to settle the deposit.

Arguments over deposits almost always come down to one question: what did the property look like on the day the tenant moved in? Without a clear answer, it’s your memory against theirs.
A good move-in inventory settles that question before it’s ever asked. Below you’ll find what to include, how to take photos that actually help, and a free room-by-room checklist you can print or use on your phone.
Why a move-in inventory matters
- It protects the deposit for both sides. Landlords can show real damage, and tenants can show a mark was already there.
- It speeds up the move-out. Comparing two records takes minutes instead of days of back-and-forth.
- It supports fair deductions. Deposit schemes, tribunals and courts generally look for dated evidence, not recollections.
- It sets expectations. Tenants who have seen and signed a detailed inventory tend to take more care.
What a good inventory includes
A useful inventory is more than a list of furniture. Make sure yours has:
- The property address, tenancy start date and the names of everyone present.
- A condition note for every item, such as “good”, “fair” or “poor”, with a short description of any marks, chips or stains.
- Photos and short videos of each room and of anything already damaged.
- Meter readings for electricity, gas and water, with photos of each meter.
- Keys and access devices handed over, with how many of each.
- Appliances and furnishings included in the let, noting make and model where it helps.
- Signatures and dates from the landlord and the tenant.
How to record a move-in inventory, step by step
- Do it as close to move-in as possible, after cleaning and any repairs, but before the tenant’s belongings arrive.
- Work through the property in the same order every time, for example front door, then clockwise room by room.
- Photograph each room from the doorway first, then each wall, the floor and the ceiling.
- Take close-ups of anything that isn’t perfect, with something for scale such as a coin or a ruler.
- Write the condition down as you go. Photos show what something looks like, notes explain what you’re looking at.
- Test what can be tested: taps, lights, sockets, heating, appliances, windows and locks.
- Share the inventory with the tenant and give them time, around a week is common, to add comments and sign.
- Store a copy you both can access, together with the signed tenancy agreement.
Photo tip: turn on date stamps, or keep the original files, which include the date and time in their details. Take a slow video walkthrough as a backup; it captures things photos miss.
Free move-in inventory checklist
Tick each item as you check it, then record its condition and take photos. Adapt the list to the property; remove what doesn’t apply and add anything special.
Entrance and hallway
- Front door, frame, lock and letterbox
- Doorbell and intercom
- Walls, skirting boards and ceiling
- Flooring or carpet
- Light fittings and switches
- Coat hooks, shelves and cupboards
Living room
- Walls, ceiling and paintwork
- Flooring, carpet or rugs
- Windows, frames, locks and sills
- Curtains, blinds and rails
- Radiators, heaters or air conditioning
- Sockets, switches and light fittings
- Furniture (sofa, tables, chairs, shelving)
- TV point and internet socket
Kitchen
- Worktops, cupboards, drawers and handles
- Sink, taps and drainage
- Oven, hob and extractor hood (inside and out)
- Fridge and freezer (seals, shelves, inside clean)
- Washing machine, dishwasher and microwave
- Tiles, splashback and grouting
- Flooring
- Bins, fire blanket and any utensils included
Bathroom
- Toilet, seat and flush
- Bath or shower, screen or curtain
- Basin, taps and plugs
- Tiles, grouting and sealant (look for mould)
- Extractor fan and ventilation
- Mirror, cabinet and towel rail
- Flooring
Bedrooms (repeat for each)
- Walls, ceiling and paintwork
- Flooring or carpet
- Windows, locks, curtains and blinds
- Wardrobes, drawers and shelving
- Bed frame and mattress (check for stains)
- Sockets, switches and light fittings
Outside, balcony and garage
- Garden, lawn, fences and gates
- Balcony railings and floor
- Garage or parking space, doors and remotes
- Outdoor lights, bins and storage
Utilities and safety
- Electricity, gas and water meter readings (with photos)
- Smoke alarms tested
- Carbon monoxide alarms tested, where fitted
- Fuse box or consumer unit, and where the main water stopcock is
- Boiler or water heater working
- Appliance manuals and warranty details
Keys and handover
- Front door keys (number of each)
- Window keys, mailbox keys, fobs and gate remotes
- Tenant has reviewed the inventory
- Landlord and tenant signatures, with the date
Prefer to fill it in on your phone? Our free property inspection checklist lets you add rooms, rate their condition, attach photos and collect a signature, then print or save it as a PDF.
At move-out: compare, don’t guess
At the end of the tenancy, walk through the property with the move-in inventory in hand and photograph the same spots from the same angles. For each difference, ask whether it’s damage or fair wear and tear.
| Usually fair wear and tear | Usually damage |
|---|---|
| Light scuffs on walls from furniture | Large holes, crayon marks or unapproved painting |
| Carpet flattened in walkways | Burns, pet stains or large tears in carpet |
| Paint faded by sunlight | Broken windows, doors or fittings |
| A few small nail holes from pictures | Cracked tiles or a broken shower screen |
| Loose door handles from everyday use | Missing items listed on the inventory |
Then think about the age of what was damaged. A carpet that was already eight years old at move-in isn’t worth the price of a new one. Our free deposit deduction calculator helps you itemise deductions and show exactly how the refund was worked out.
Deposit rules depend on where you let
Deposit protection varies a lot between countries and states, so check what applies to your property. For example, in England and Wales, landlords must protect a tenant’s deposit in a government-approved scheme within 30 days of receiving it and give the tenant the required information about where it’s held (GOV.UK). A detailed, signed inventory is one of the strongest pieces of evidence if a deduction is ever disputed.
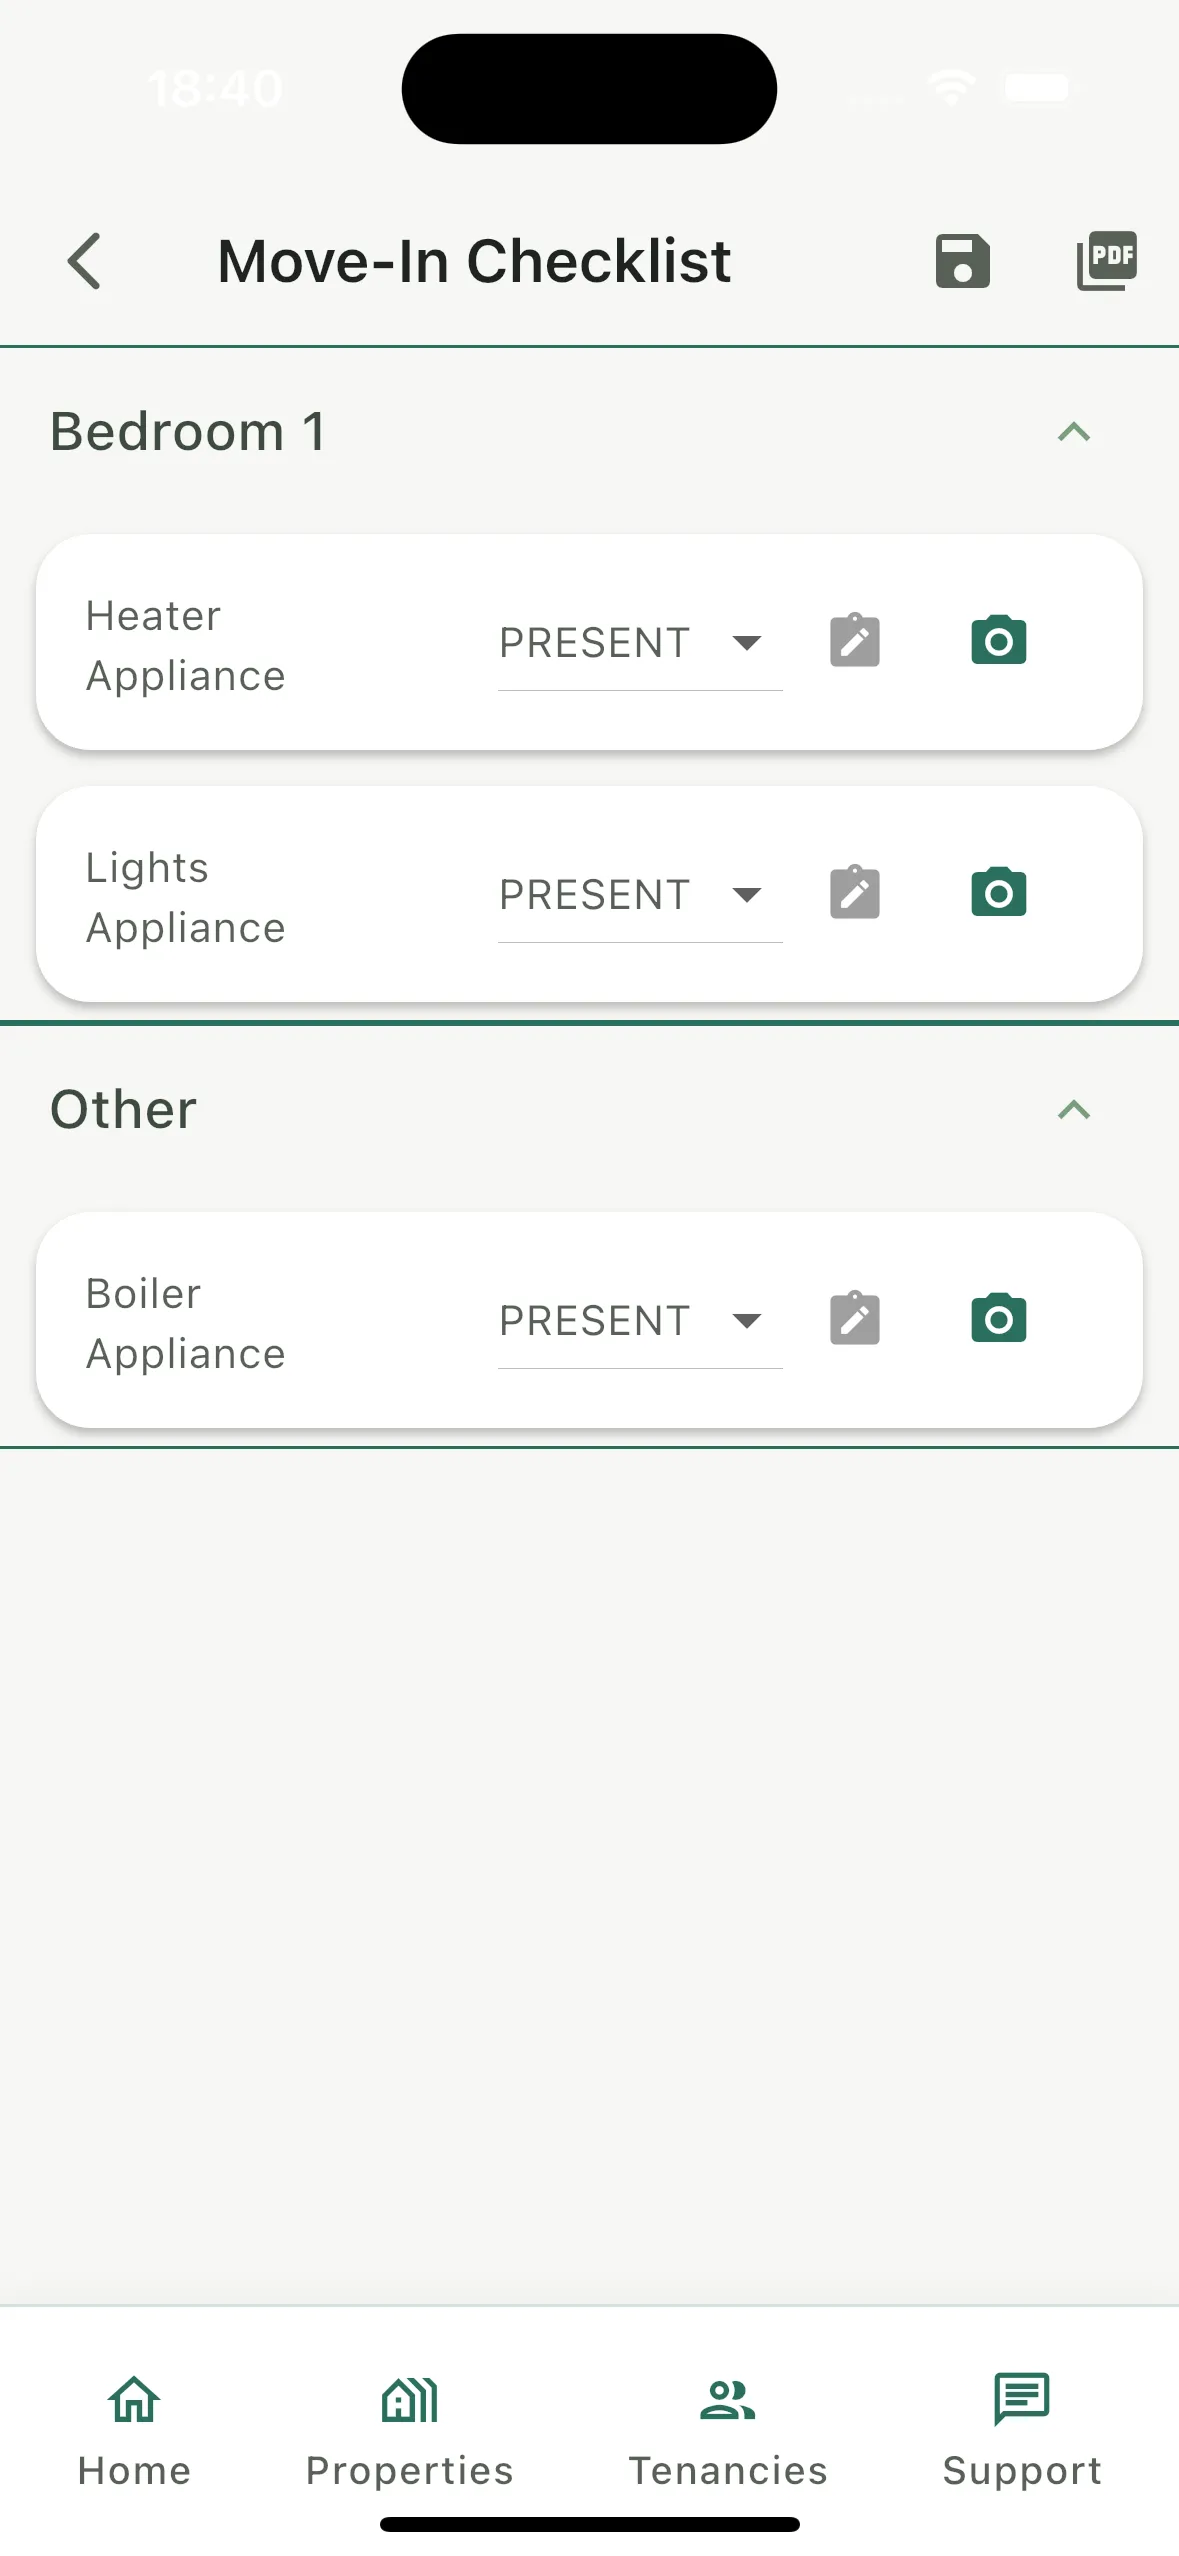
Do it all in the Rhentto app
Paper checklists get lost and photos end up scattered across phones. Rhentto keeps it all with the tenancy:
- Move-in and move-out checklists organised by room, with each item’s condition.
- Photos attached to the item they show, so evidence is easy to find later.
- An inventory you can search by location and category.
- Deposit deductions recorded with the reason and amount for each one at the end of the tenancy.
The bottom line
A move-in inventory takes an hour or two and can save weeks of dispute. Record every room, photograph everything, note meter readings and keys, get the tenant to review and sign it, and compare like for like at move-out. Keep it with your other tenancy records; see how in our guide to tracking rent and expenses without a spreadsheet.
Frequently asked questions
What is a move-in inventory?
A move-in inventory is a dated record of the condition of a rental property and its contents at the start of a tenancy, usually with written notes and photos for each room. It is compared with the property’s condition at move-out to decide whether any deposit deductions are fair.
Who should do the move-in inventory, the landlord or the tenant?
Usually the landlord or their agent prepares it, then the tenant reviews it, adds anything that was missed and signs it. An inventory that both sides have seen and agreed is far more useful in a dispute than one only one side has signed.
How long should a tenant have to check the inventory?
There is often no fixed rule, but giving the tenant around seven days to review the inventory, add comments and return a signed copy is a common and fair approach. Check whether your local rules or tenancy agreement set a specific timeframe.
Can a landlord deduct for fair wear and tear?
Generally no. Deposits are meant to cover damage beyond normal use, unpaid rent or other breaches of the agreement, not the gradual ageing of a home. Rules differ by location, so check what applies to your tenancy.
Free tools for this
Keep reading
- How to Track Rent Payments and Rental Expenses Without a SpreadsheetA simple system for small landlords to track rent, partial and late payments, deposits and expenses, with a 15-minute monthly routine and year-end checklist.
- Rent Receipt Template: Do Landlords Have to Provide One?When landlords must give rent receipts, with examples from New York, California, England and India, what every receipt should include, and a free template.